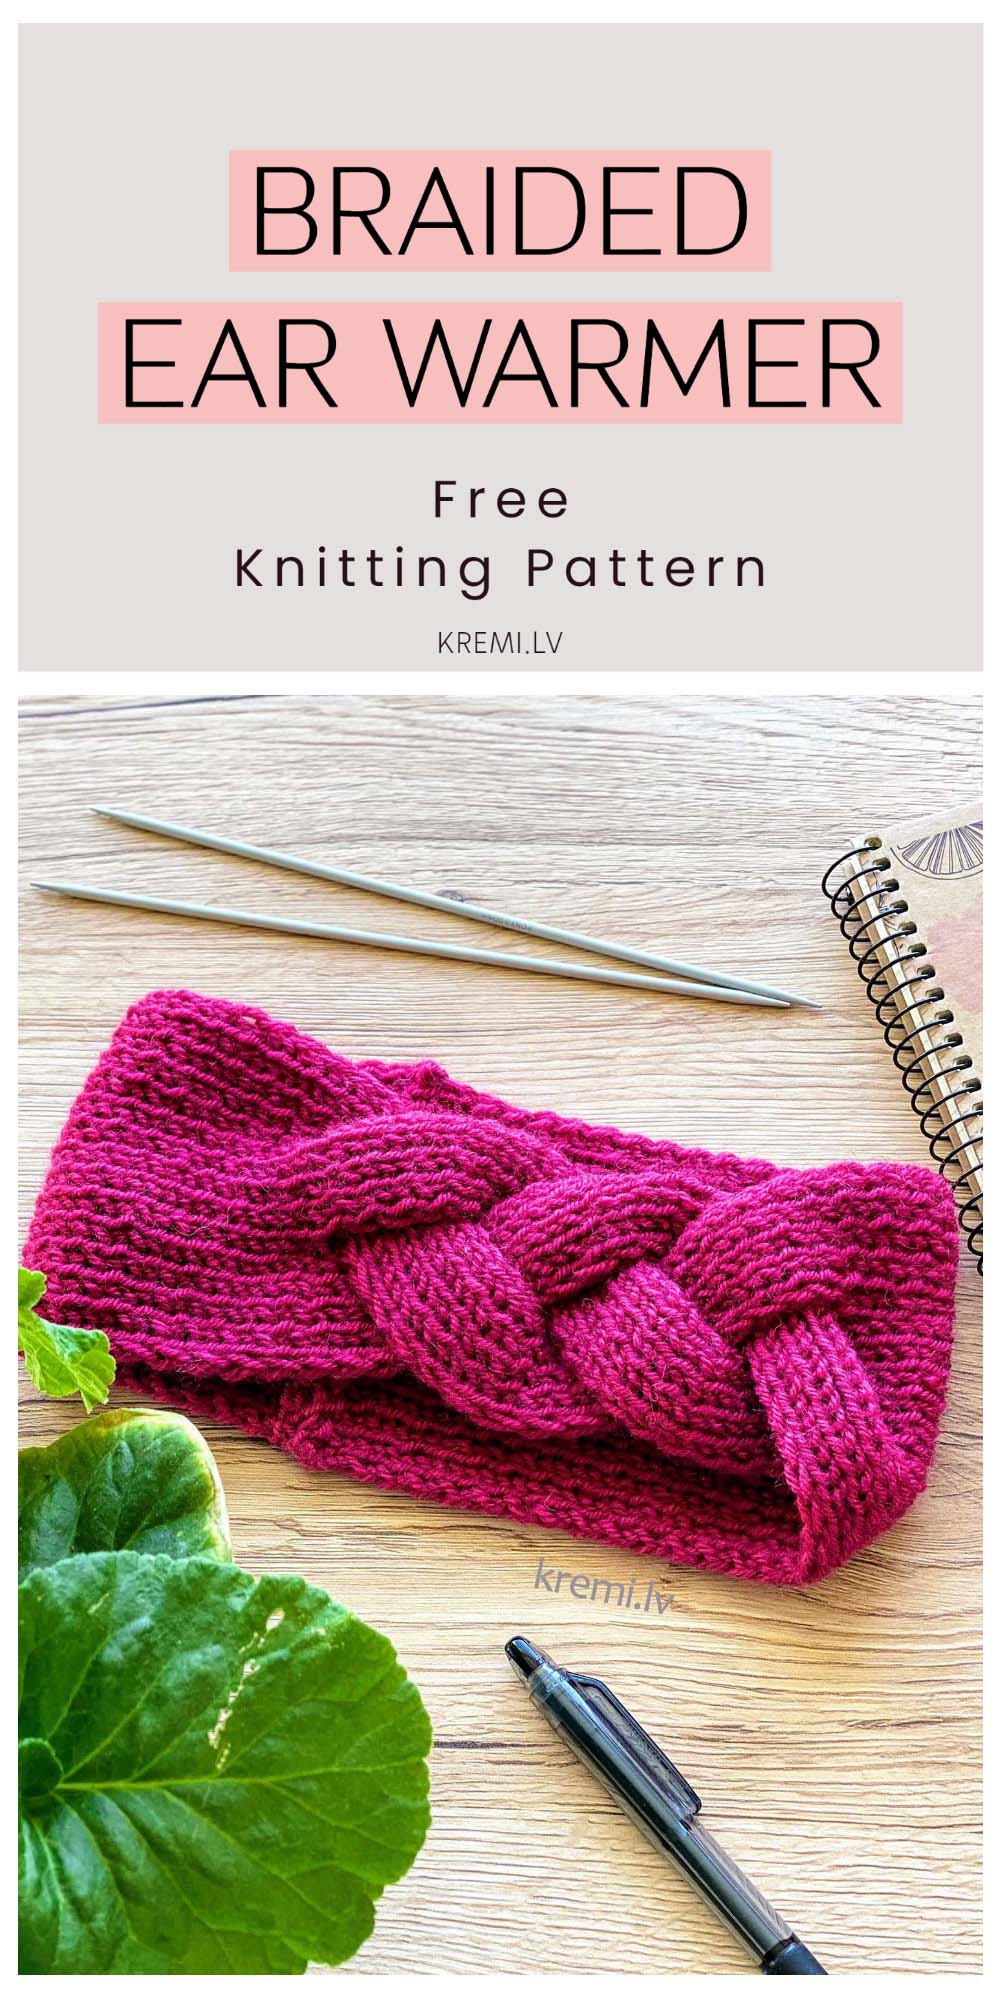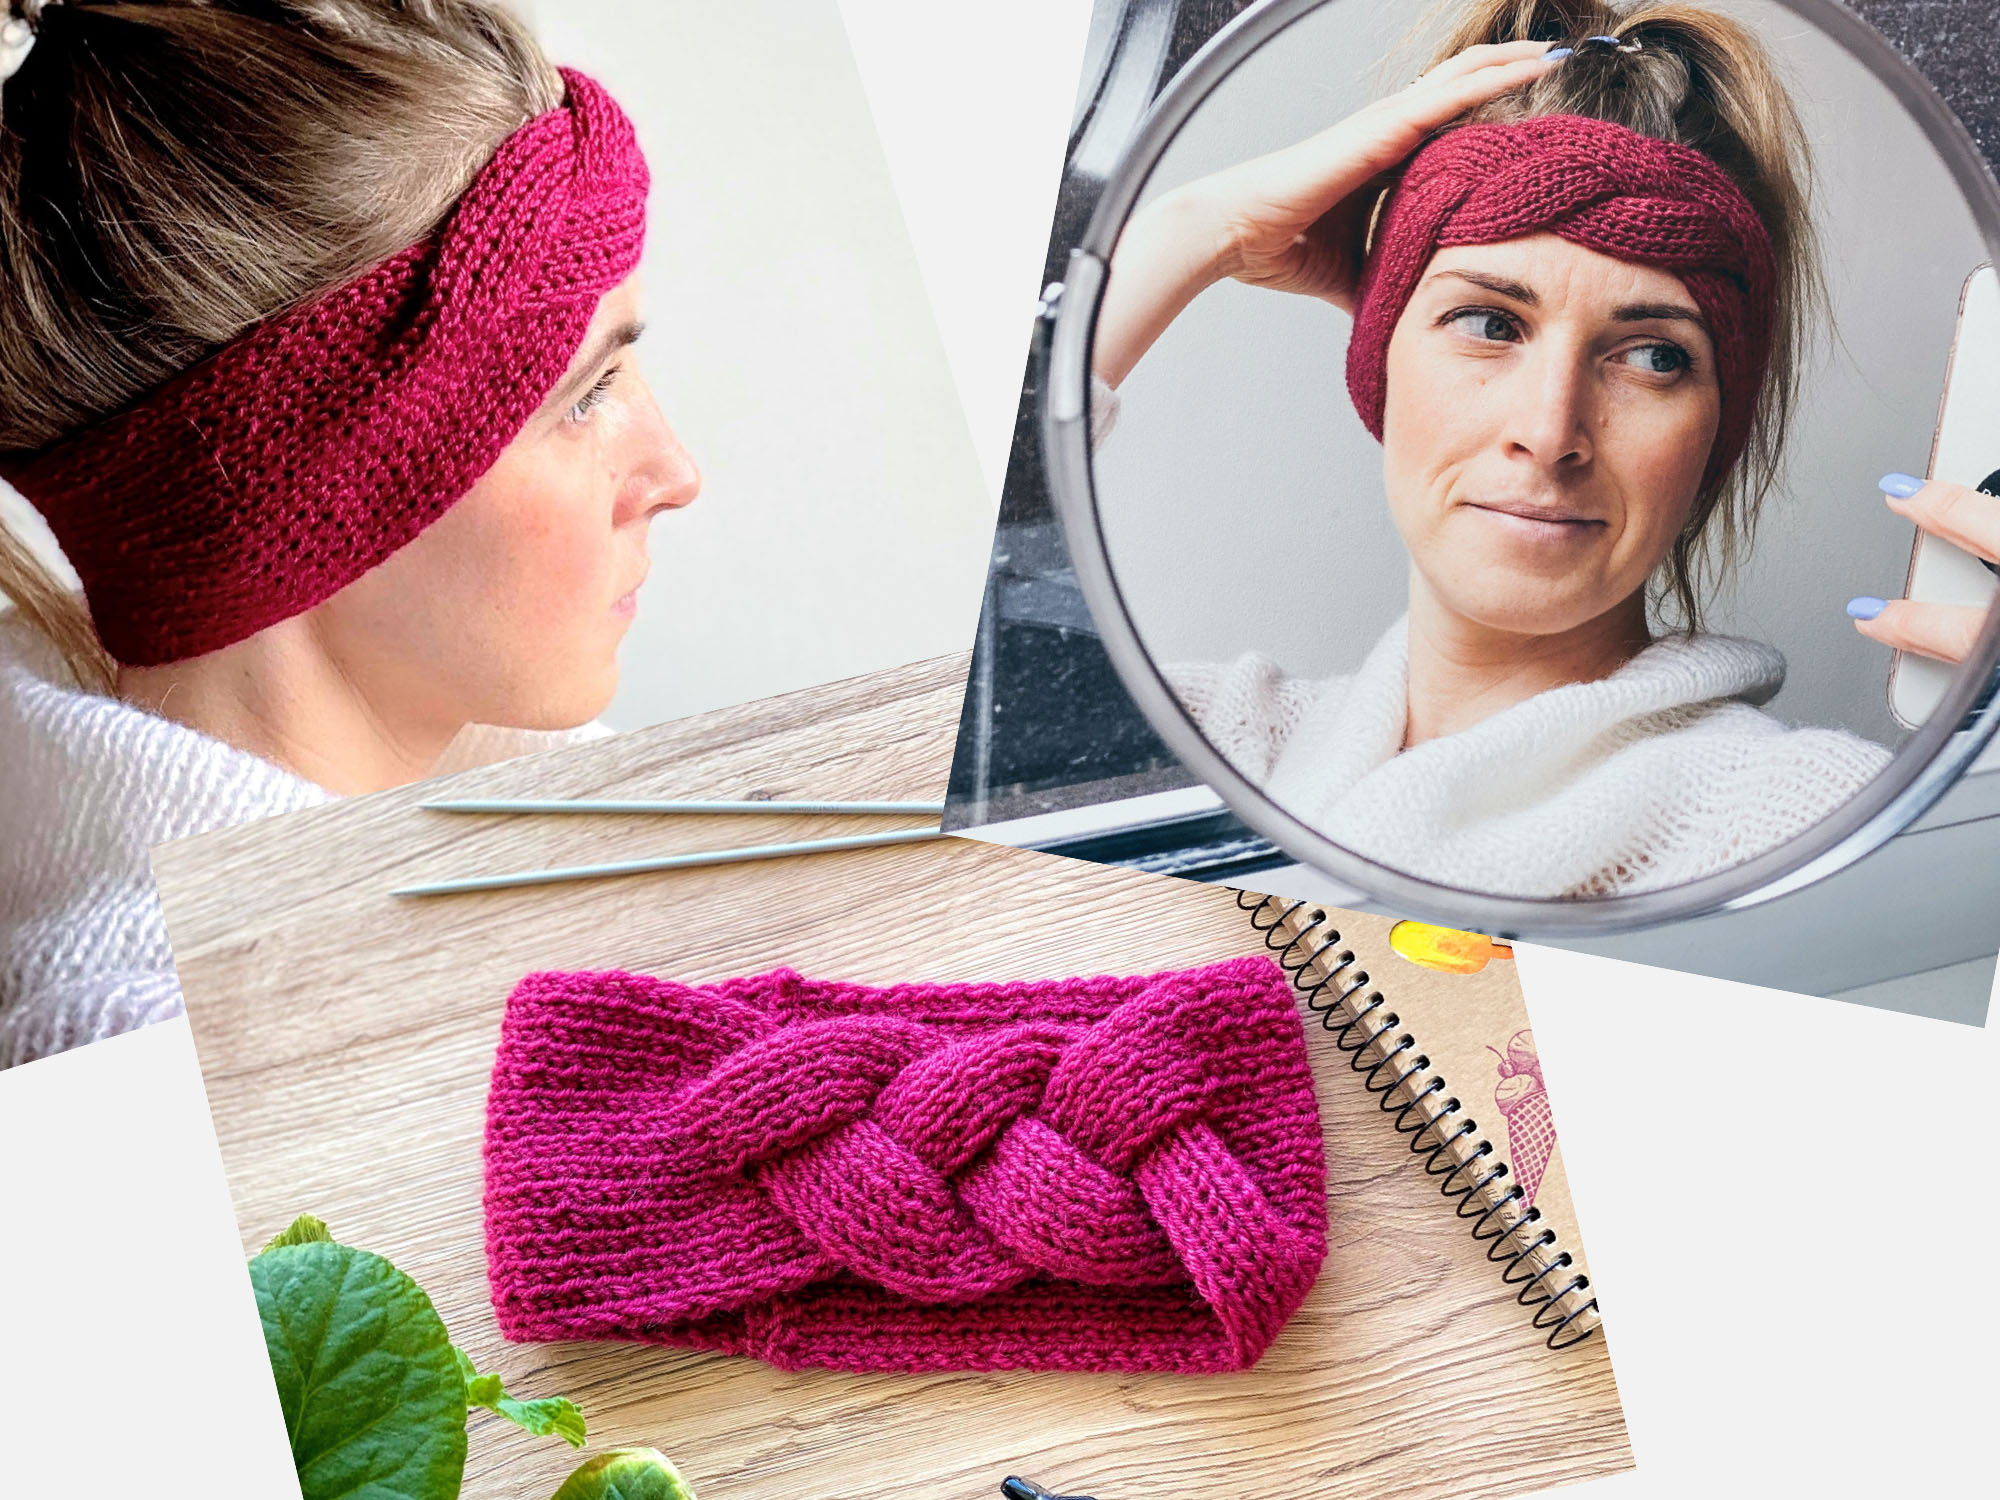
Braided Headband Free Knitting Pattern And Tutorial
A beautiful autumn and spring accessory. A neat ear warmer that is very easy to knit.
I believe that this knitting tutorial is perfect for knitters with little knowledge.
Such a beautiful gift for mom or a friend.
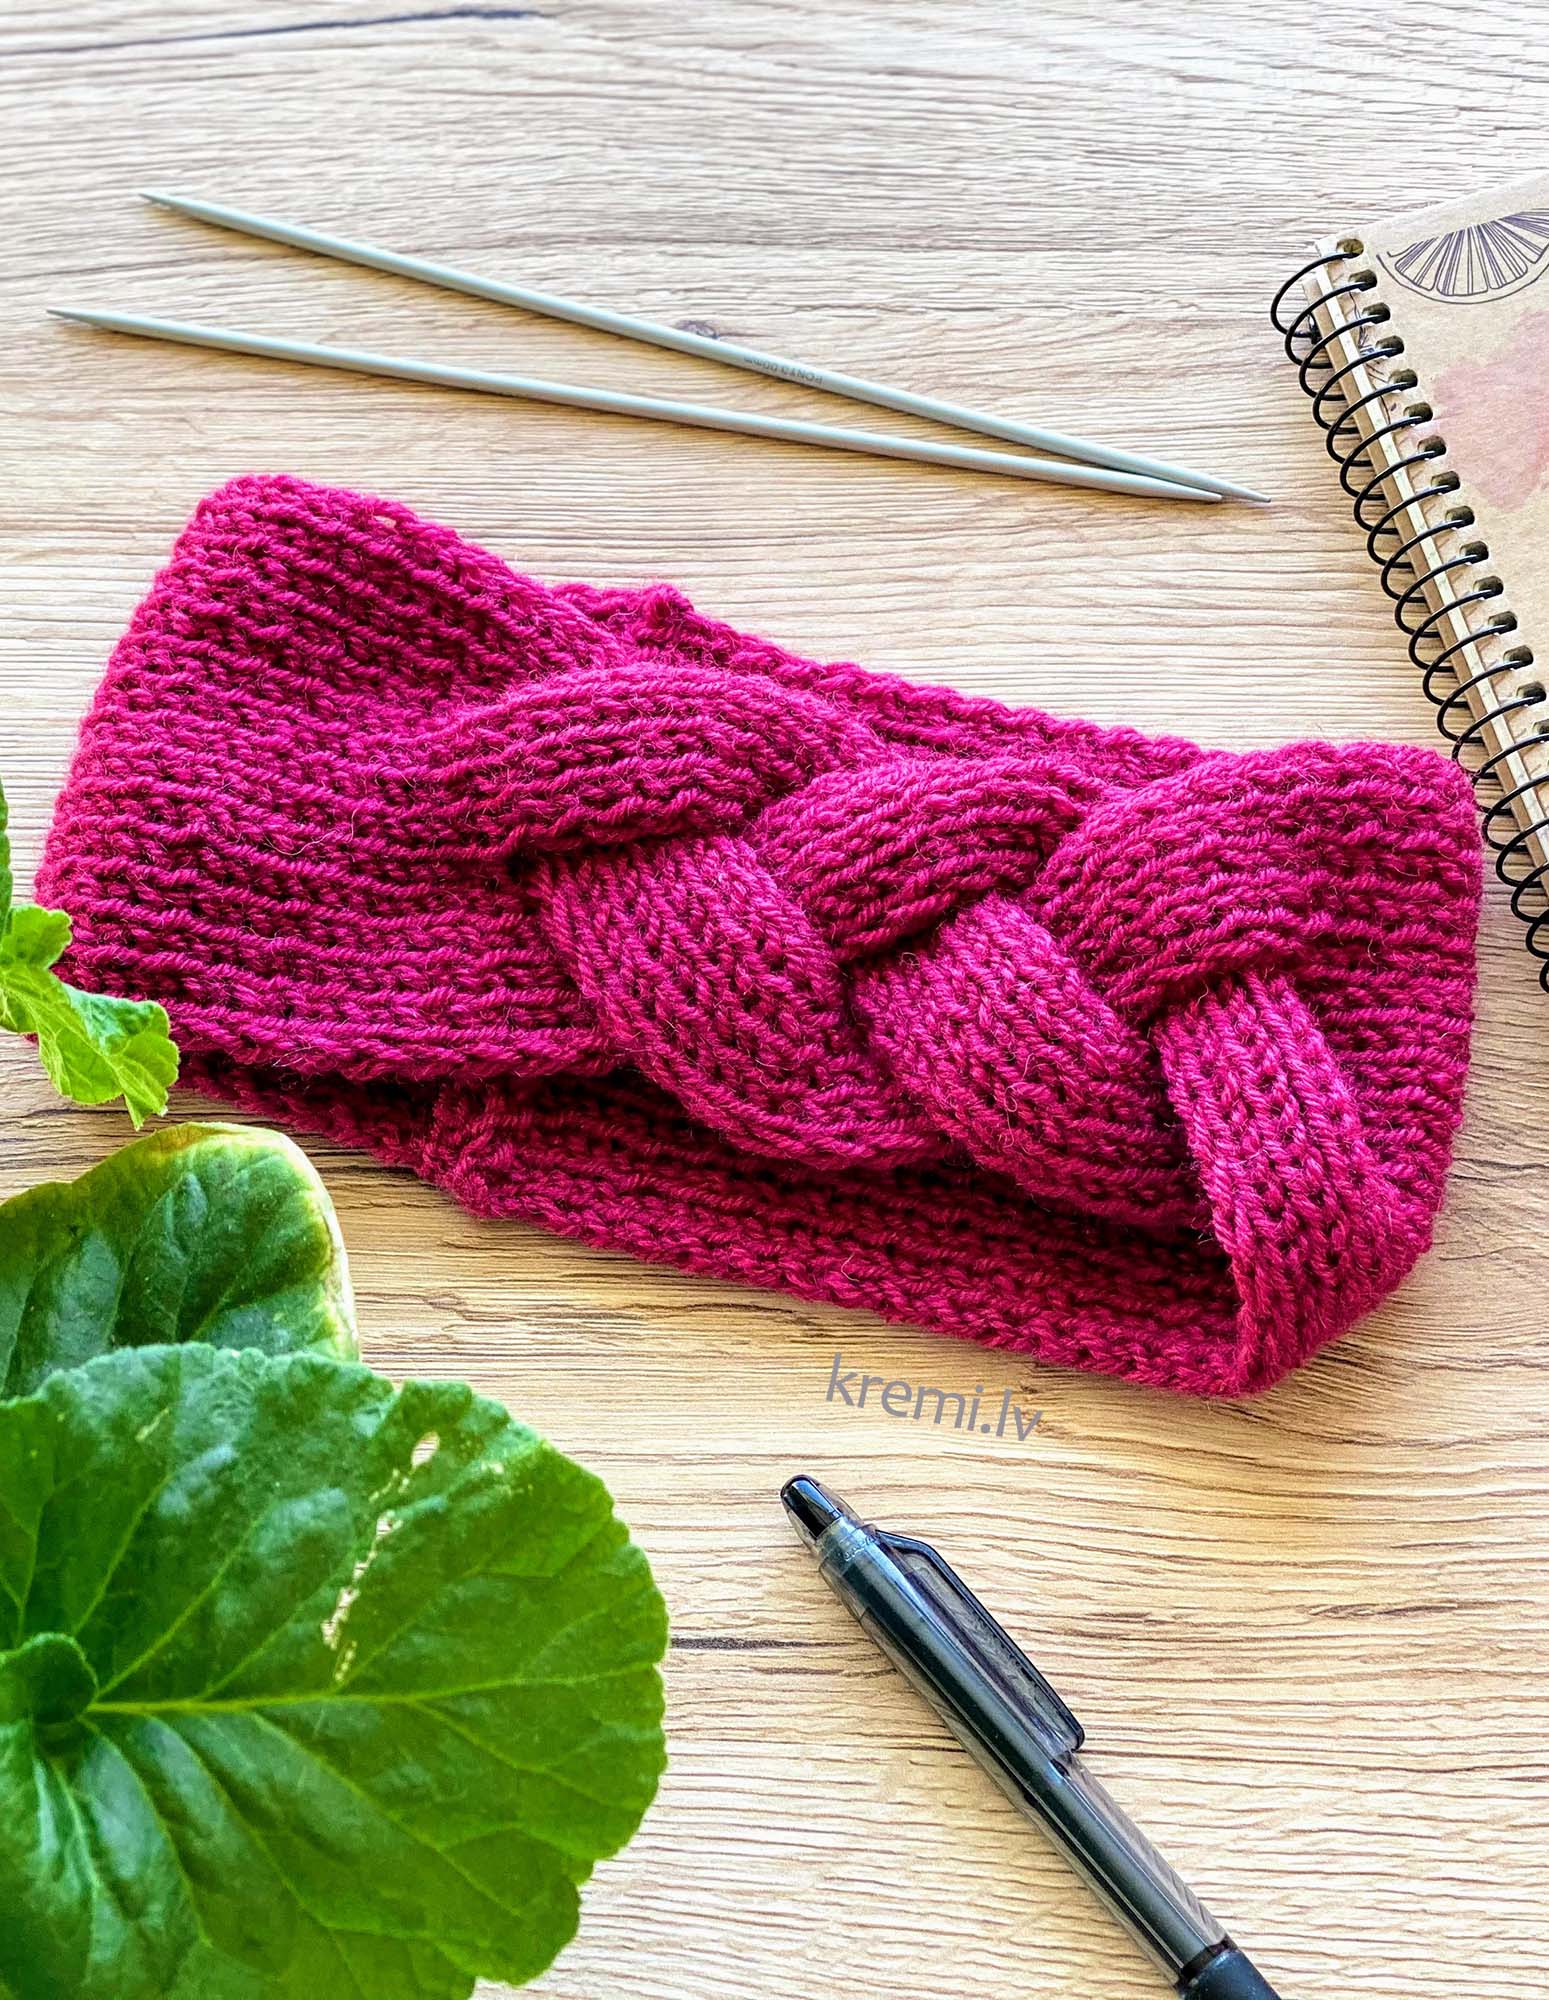
For knitting an ear warmer, just like knitting a hat, you need to choose a soft yarn, one that does not bite the forehead. I recommend using 100% acrylic yarn. In my example, I used regular acrylic yarn and 3 mm curling needles. Since this is a small project, smaller needles can also be used, just remember to knit loosely so the knit doesn’t get stiff.
My head circumference is 57 cm and the ear warmer fits just right, not too tight and not too loose.
Before starting to knit, we roll two separate balls, about 3-4 cm in diameter.
We pick up 33 stitches on the needles using the larges yarn ball, two small ones we will use later.
Knit one stitch and purl one stitch. A 16 cm long piece should be knitted.
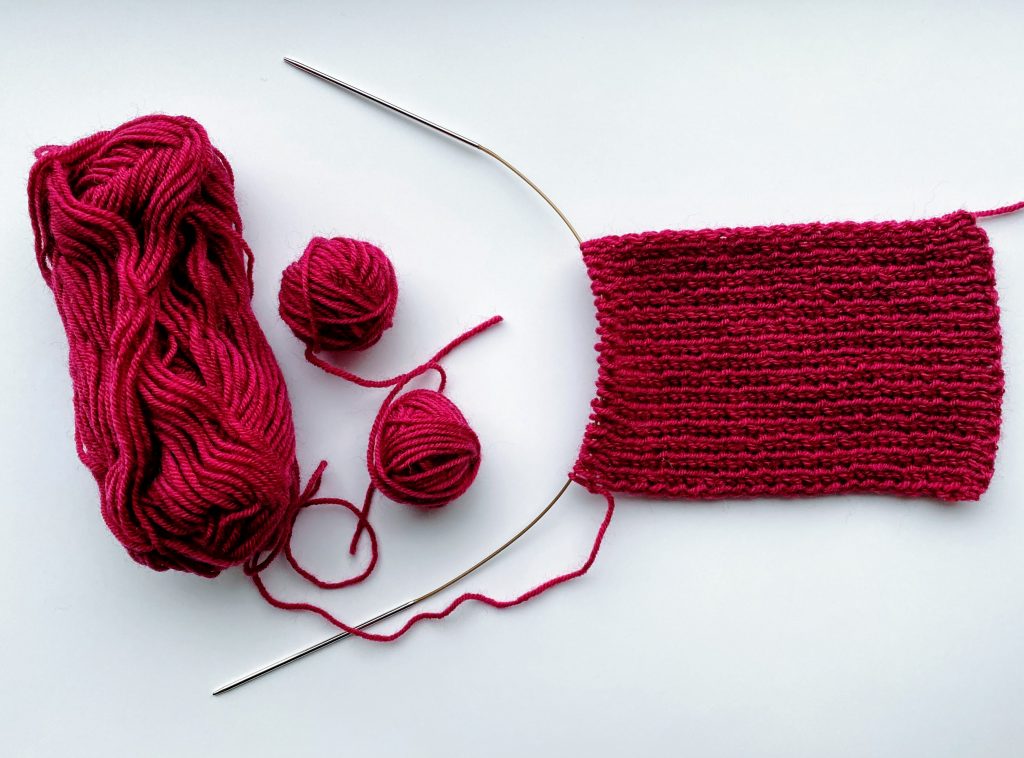
Then you need to take two additional yarn balls and divide the knitting into 3 parts, 11 stitches in each part.
We knit 3 separate strips as shown in the following picture.

We knit until the strips are 16 cm long.
Next, we remove the knitted strips from the needle. And braid them. In order to get a nice braid, I started braiding with the middle strip, bending it to one of the sides.
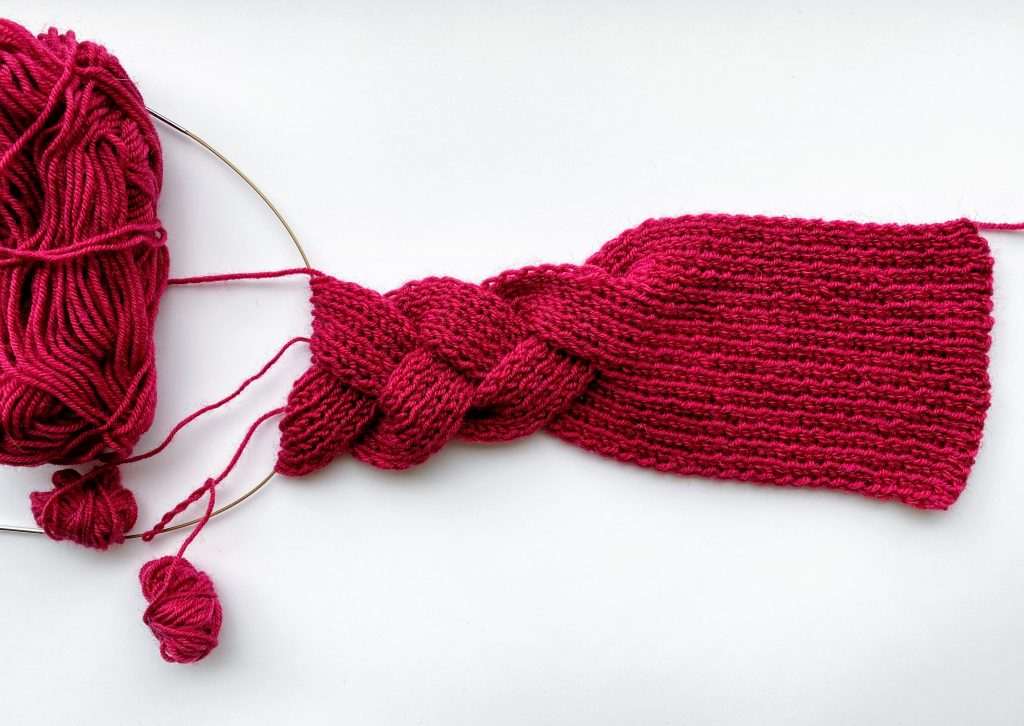
I braid the braid quite tightly, as shown in the following picture. When I finished braiding, I tried to make the strip with the big skein meet at the very edge, so that after that I could easily start knitting without cutting the thread.
Now you can cut off the two small lumps, leaving about 7 cm tails.
Next, we continue to knit all the strips together. At this point, it will be the case that when you knit-purl, two knit stitches will be formed in a row, or two purl stitches, in the place where the braided strips join. In this case, it will be necessary to knit or purl two stiches that are same together so that the purl-knit ribbing knit does not fall apart. I had to stitch twice.
Tear off all the stitches and cut the thread long enough, around 25 cm. We will use this long thread to sew both ends of the ear warmer together.
Before sewing both ends, fasten and pull in all ends of the braid thread, and only then sew the ends. It will be easier.